
Tutorials
29/07/2009 15:41Tutorial - HelloWorld
This tutorial explains the basics of creating an AutoIt script and running it. The tutorial assumes that you have already fully installed AutoIt v3 using the supplied installer.
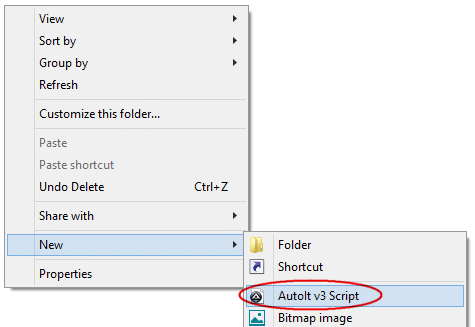
First open a folder where you wish to create the script. Right-click in the folder and select New / AutoIt v3 Script.
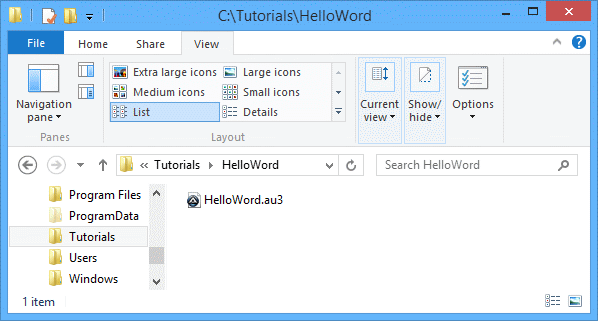
A new file will be created, immediately allowing you to rename it to something more appropriate. Change 'New AutoIt v3 Script' to 'helloworld', leaving the '.au3' in the name intact if it is visible.
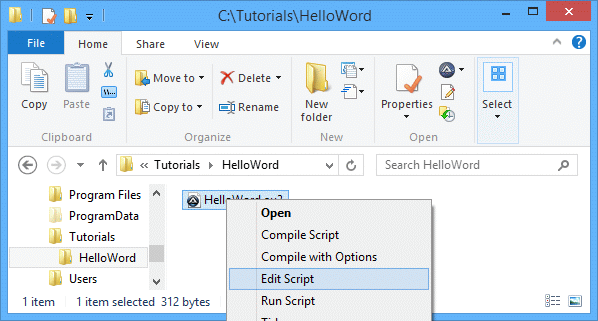
Now we have created the script file we want to edit it to make it do something useful. Right-click on helloworld.au3 and select Edit Script.
The SciTE editor will open and you will see something like this:
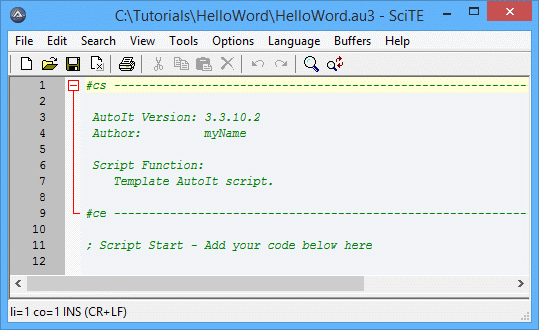
The code you see is simply some comments that you can use to organise your scripts. The lines that start with a semi-colon ; and are treated as comments (ignored). ; is similar to the REM statement in a DOS batch file.
Now we want to tell AutoIt to display a message box - this is done with the MsgBox function.
At the bottom of the file type the following:
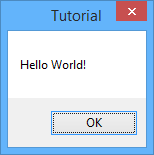
MsgBox(0, "Tutorial", "Hello World!")
All functions take parameters, MsgBox takes three - a flag, a title and a message. The flag is a number that changes the way MsgBox displays - we will use 0 for now. The title and message are both string parameters - when using strings in AutoIt surround the text in double or single quotes. "This is some text" or 'This is some text' - both will work fine.
Now save the script and close the editor. You've just written your very first AutoIt script! To run the script simply double-click the helloworld.au3 file (you may also right-click the file and select Run Script) .
You should see this:
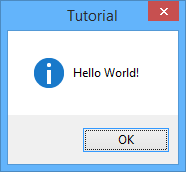
Now, let's look at the flag parameter for the MsgBox function again. From the manual page we can see various values listed which change the way MsgBox displays. The value of 0 simply shows a simple message box with an OK button. A value of 64 displays the message box with an information icon.
Edit the script again and change the 0 to 64 so you have:
MsgBox(64, "Tutorial", "Hello World!")
Run the script and you will see:
Experiment with the various flag values to see what kind of results you can get. Remember, if you want to use more than one flag value then simply add the required values together.
Tutorial - Notepad
This tutorial explains how to automate the opening of Notepad, automatically type some text and then close Notepad. It is assumed that you are already familiar with creating and running AutoIt scripts as shown in the HelloWorld tutorial.
First create an empty script called npad.au3 and then edit the file (using Notepad or SciTe as you prefer).
The first thing we need to know is the name of the Notepad executable. It is notepad.exe - you can get this information by looking at the properties of the Notepad shortcut icon in the Start Menu. To execute Notepad we use the AutoIt Run function. This function simply launches a given executable and then continues.
Type in the first line of script as:
Run("notepad.exe")
Run the script - if all goes well then a new instance of Notepad should open.
When automating applications AutoIt can check for window title so that it knows which window it should work with. With Notepad the window title is obviously Untitled - Notepad. AutoIt is case-sensitive when using window titles so you must get the title exactly right - the best way to do this is to use the AutoIt Window Information Tool. Run the Information Tool from Start Menu \ AutoIt v3 \ AutoIt Window Info.
With the Info Tool open click on the newly opened Notepad window to activate it; the Info Tool will give you information about it. The information we are interested in is the window title.
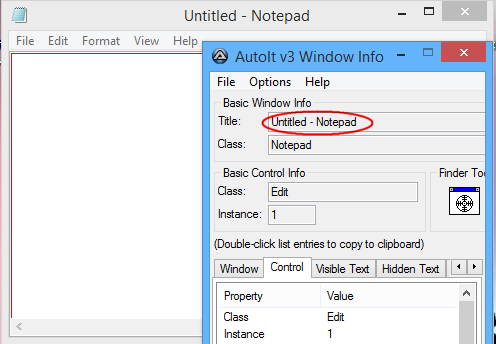
Highlight the title in the AutoIt Info Tool window and press CTRL-C to copy it to the clipboard - we can then paste the title into our script without fear of misspelling it.
After Running a copy of Notepad we need to wait for it to appear and become active before we send any keystrokes. We can wait for a window using the WinWaitActive function. Most window-related functions in AutoIt take a window title as a parameter.
Enter the following as the second line in the script (use CTRL-V or Edit\Paste to paste our window title from the clipboard).
WinWaitActive("Untitled - Notepad")
After we are sure the Notepad window is visible we want to type in some text. This is done with the Send function.
Add this line to our script.
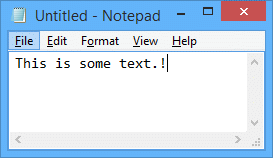
Send("This is some text.")
The entire script will now look like this:
Run("notepad.exe")
WinWaitActive("Untitled - Notepad")
Send("This is some text.")
Close the copy of Notepad that we previously opened (you will need to do this every time you run the script otherwise you will end up with lots of copies running!). Run the script.
You should see Notepad open, and then some text will magically appear!
Next we want to close notepad, we can do this with the WinClose function.
WinClose("Untitled - Notepad")
When Notepad tries to close you will get a message asking you to save the changes. Use the Window Info Tool to get details of the dialog that has popped up so that we can respond to it :)
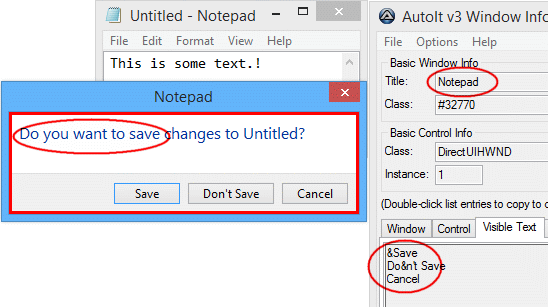
So, we add a line to wait for this dialog to become active (we will also use the window text to make the function more reliable and to distinguish this new window from the original Notepad window):
WinWaitActive("Notepad", "Do you want to save")
Next we want to automatically press Alt-N to select the No/Don't save button (Underlined letters in windows usually indicate that you can use the ALT key and that letter as a keyboard shortcut). In the Send function to send an ALT key we use ! .
Send("!n")
Our complete script now looks like this:
Run("notepad.exe")
WinWaitActive("Untitled - Notepad")
Send("This is some text.")
WinClose("Untitled - Notepad")
WinWaitActive("Notepad", "Do you want to save")
Send("!n")
Run the script and you will see Notepad open, some text appear, then close! You should be able to use the techniques learned in this tutorial to automate many other applications.
Tutorial - WinZip
This tutorial explains how to automate the installation of WinZip 9 SR-1. It is assumed that you are already familiar with creating and running AutoIt scripts and the use of the AutoIt Window Information Tool to read window titles and text, as shown in the HelloWorld and Notepad tutorials.
The WinZip installation consists of approximately 10 dialog boxes that you must click buttons (usually Next) to continue. We are going to write a script that simply waits for these dialog boxes to appear and then clicks the appropriate buttons. As usual with these types of installations the window title of each dialog is the same (WinZip Setup) so we must use window text to tell the difference between windows. Screenshots of each dialog will be provided and you can click on the picture to see the Information Tool output for that dialog.
First create a directory that we will use for the WinZip installer and our script file. Copy the WinZip installer to this directory and create a blank script called winzipinstall.au3.

We will now run through the installation manually and write the script as we go. The script lines to automate each dialog will be shown after each picture (remember to click on the picture to see the AutoIt Window Information Tool output). You can also look at the completed script for reference.
The first script line is easy, we want to run the winzip90.exe installer. So the first line is:
Run("winzip90.exe")
The first dialog will pop-up:

We need to wait for this window to popup and become active, and then we need to send the keystroke ALT-s to click the Setup button. The resulting script lines are:
WinWaitActive("WinZip® 9.0 SR-1 Setup", "&Setup")
Send("!s")
(Remember to click on the picture to see the AutoIt Window Information Tool output, this is especially important as the title contains the special (R) character which would be difficult to type).
The installation location dialog will appear next:
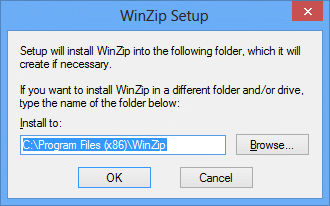
We need to wait for this screen to be active and then click ENTER to accept the install location. The script lines are:
WinWaitActive("WinZip Setup", "into the following folder")
Send("{ENTER}")
The WinZip Features dialog will appear next:
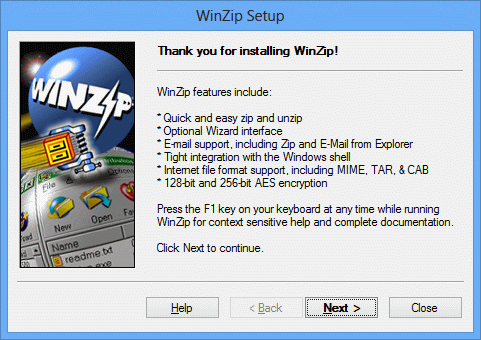
Notice that this window has exactly the same title as the first of WinZip Setup - in fact all the dialogs in the setup have this title! In order to tell the difference between these windows we must also use the window text - on each screen try to pick the most unique text you can. In this case I've chosen WinZip features include. After the window has appeared we will want to press ALT-n:
WinWaitActive("WinZip Setup", "WinZip features include")
Send("!n")
The License dialog will appear next:
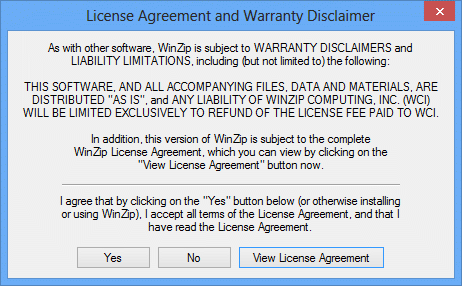
Wait for the window to appear and then press ALT-y to accept the agreement:
WinWaitActive("License Agreement")
Send("!y")
Setup continues in a similar fashion for a few dialogs. The picture of each dialog is shown along with the script lines needed to automate it.

WinWaitActive("WinZip Setup", "Quick Start Guide")
Send("!n")
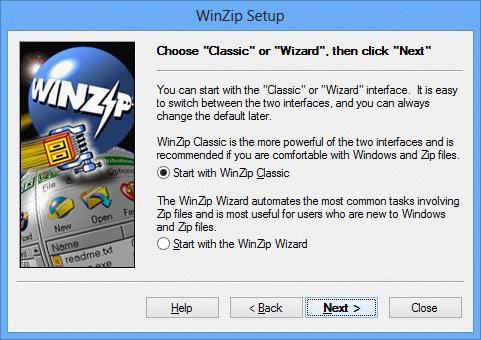
WinWaitActive("WinZip Setup", "switch between the two interfaces")
Send("!c")
Send("!n")
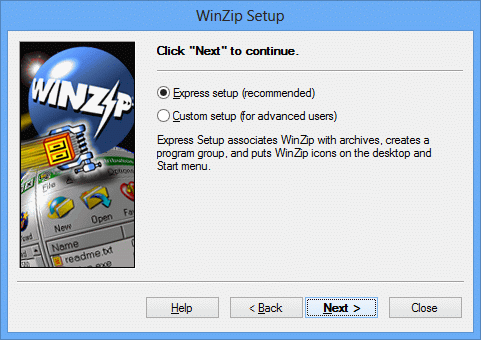
WinWaitActive("WinZip Setup", "&Express setup (recommended)")
Send("!e")
Send("!n")
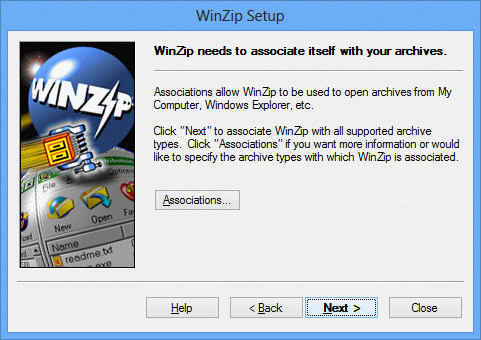
WinWaitActive("WinZip Setup", "WinZip needs to associate itself with your archives")
Send("!n")
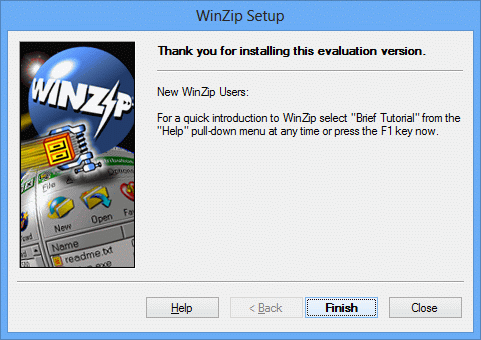
This is the final dialog of the setup. Notice that the Finish button doesn't have a keyboard shortcut - luckily it is the default button on this dialog so we can just press ENTER to select it. If this were not the case then we would have to TAB between controls or better yet use the ControlClick function.
WinWaitActive("WinZip Setup", "Thank you for installing this evaluation version")
Send("{ENTER}")
After installation WinZip will automatically start:

We simply wait for the main WinZip window to appear and then close it with the WinClose function.
WinWaitActive("WinZip (Evaluation Version)")
WinClose("WinZip (Evaluation Version)")
Here is the completed script - note that I have commented each dialog separately which makes it easier to follow and to change in the future (the next version of WinZip may be slightly different).
And that's it! Run the winzipinstaller.au3 script and watch as WinZip is installed in just a few seconds! The techniques used in this tutorial can be used to automate the installation of most programs.
As an exercise for the reader, try and redo the script but instead of using the Send function (which sends keys to the active window) to click on buttons try and use ControlClick instead which can be much more reliable. You will need to read up on Controls to do this.
———
Back